
http://www.pinterest.com/pin/41517627788660183/
http://www.pinterest.com/pin/41517627788660199/
We all LOVE how Emma's bird feeder turned out. We loved it so much she made a second one and and documented it with photos, then went and wrote up the words later to create a tutorial.
The lazy mama that I am, I have not gotten around to posting her tutorial until now (I have totally given up all hopes of winning mama of the year).
Enough from me. Here is Emma and her Kid Made Bird Feeder Tutorial.
*all the photos and words for this tutorial are Emma's*
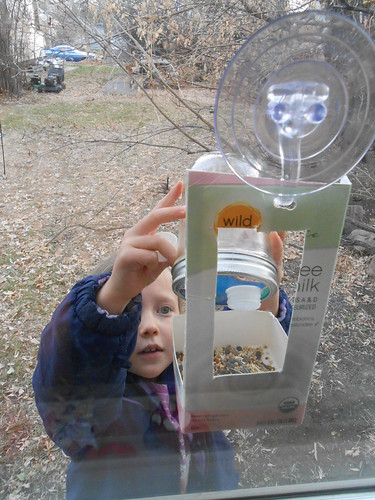
How To Make Window Feeders
Things you need:
· Scissors, a milk carton, birdseed, a hole punch (not pictured) & suction cups (not pictured).
Let’s get started!!
Cut off the top of the milk carton.
· Cut three sides of the milk carton off & make shore you leave part of the bottom for the bird seed.
· In the last piece of the milk carton cut a window.
· Poke a hole in top & put the suction cup in the hole &… Finished!!!
p.s. & remember to have fun!!
EMMA
3 comments:
I loved the tutorial, Emma! Ellie and Stuart thought it was cool.
Emma, great tutorial. Clear and easy to follow. I bet the birds love the final result! I think Sara and Rich should do this for Olivia. She sure does enjoy watching life up close. I can just imagine her in the "chair" by their front window getting all excited when birds come to eat. Or maybe you can make one for them the next time you are here. Love you.Gr
Thanks for the great idea, Emma! I am going to show your tutorial to by daughter tomorrow morning so she can make a feeder of her own. I like how you broke up the project into simple steps. :)
Post a Comment